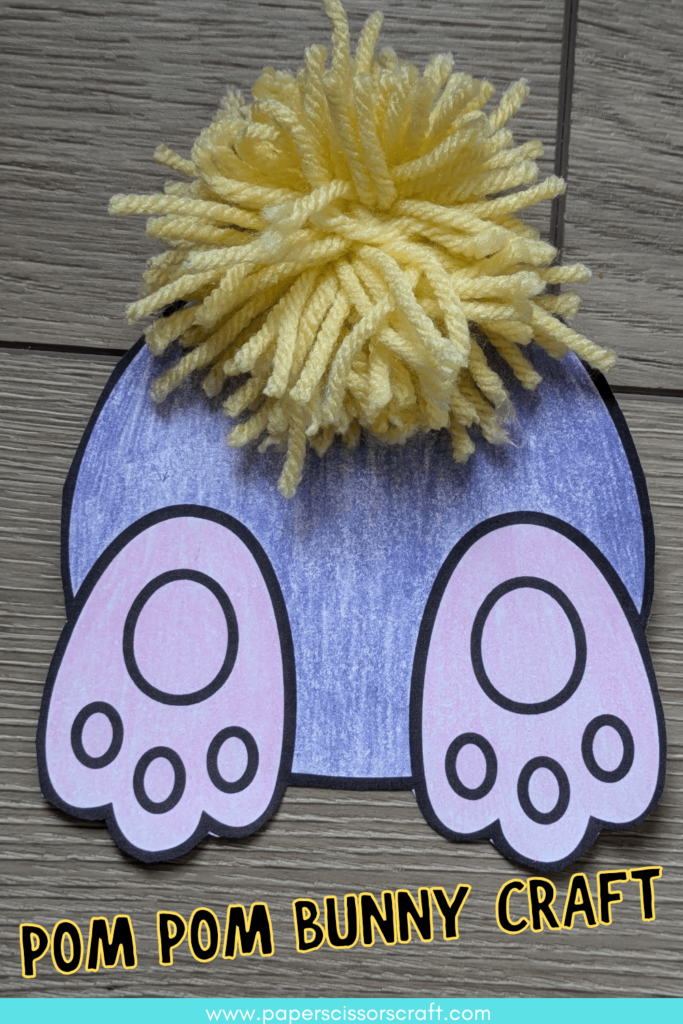
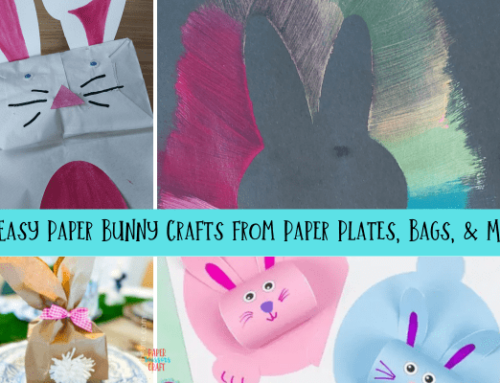
Looking for an adorable and easy Easter craft? This DIY pom-pom bunny craft is the perfect project! Soft, fluffy, and fun to make, this cute little bunny is great for kids and adults alike.
Whether you’re crafting for Easter decorations, a fun activity with the kids, or just love making cute animals, this simple pom-pom bunny is a must-try. Grab your yarn and glue, and let’s get crafting!
This post contains affiliate links.
Why I Love this Pom-Pom Bunny Craft
There’s just something about pom-poms that makes any craft instantly cuter—especially when combined with bunnies! These fluffy little creatures are already adorable, and when you turn them into a soft, handmade pom-pom bunny, the cuteness reaches a whole new level.
This craft is not only simple and fun, but it also requires very few supplies, making it perfect for all ages. Whether you’re crafting with kids or just looking for a quick and charming Easter project, this DIY bunny is sure to bring a smile to everyone’s face.
Is This a Good Easter Craft for Kids?
Yes! Pom-pom bunnies are a fantastic Easter craft for kids. Here’s why:
✔ Easy to Make – With just a few simple supplies like yarn, glue, and felt, kids can create their own fluffy bunny
✔ Great for All Ages – Younger kids can help wrap the yarn (with guidance), while older kids can do the whole project independently
✔ Minimal Mess – Unlike paint or slime crafts, pom-pom bunnies are relatively mess-free, making cleanup a breeze
✔ Encourages Creativity – Kids can customize their bunnies with different colors, accessories, or even make a whole bunny family
✔ Perfect for Easter Decor – These little bunnies make adorable decorations for Easter baskets, tables, or gifts
It’s a fun, hands-on craft that helps develop fine motor skills while celebrating the Easter season! 🐰🎨
How To Make a Pom-Pom Bunny Rabbit Craft Step-By-Step
Follow these simple step-by-step instructions to create your own adorable pom-pom bunny rabbit craft, perfect for Easter or any bunny-themed fun.
Materials
You will need:
- Yarn (any color of your choosing)
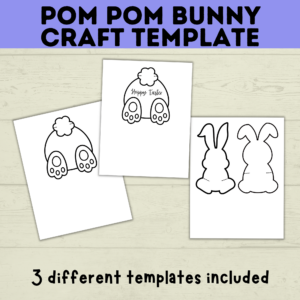
- FREE bunny template– There are 3 different ones to choose from
- Scissors
- Glue
- Google eyes (optional)
- Markers / coloring utensils
- Tiny fuzzy pom-poms (optional)
Step 1 – Print the Template
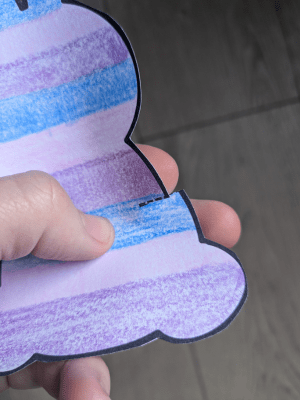
Print and cut out your chosen template, either directly onto colored paper for a vibrant look or on white paper to color and customize yourself. For a sturdier bunny, I recommend using cardstock.
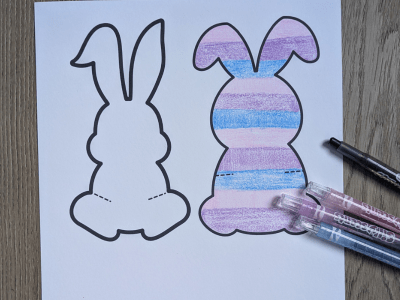
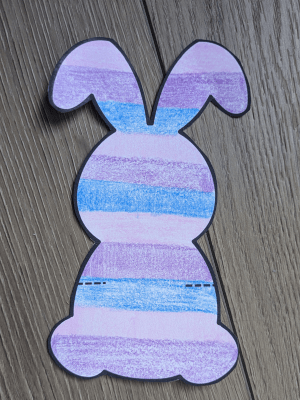
Step 2 – Color and Cut your Bunny
If you printed your bunny on white paper, go ahead and color it however you like. Then, carefully cut along the dotted lines—just a small slit, enough to insert the yarn without cutting too much.
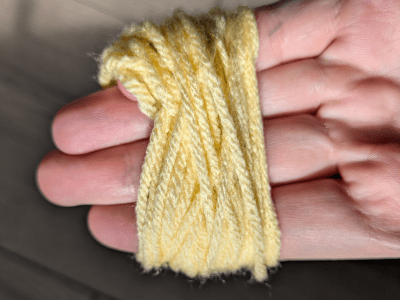
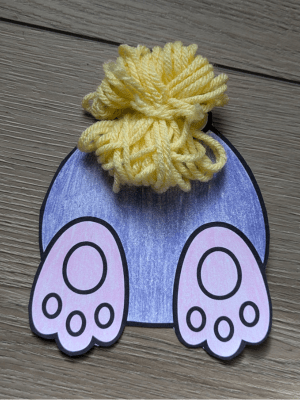
Step 3 – Make your Yarn Pom-Pom
Take a fork, a piece of cardboard, or use your hand as a base. Wrap the yarn around it at least 50–100 times (the more wraps, the fluffier the pom-pom).
Carefully slide the wrapped yarn off the base. Cut a separate piece of yarn (about 8 inches long) and tie it tightly around the middle of the bundle, securing it with a double knot.
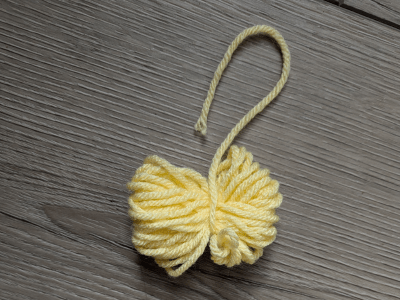
Step 4 – Tie your Pom-Pom to the Bunny
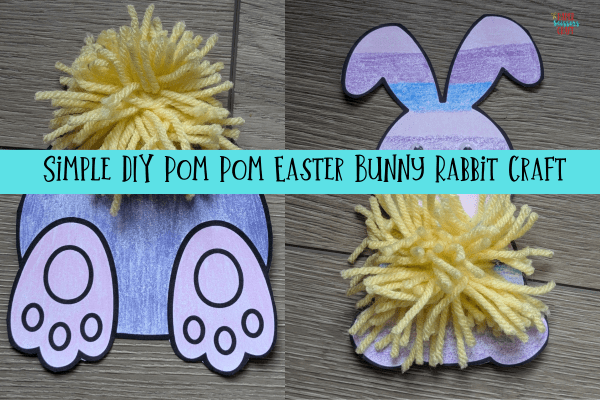
Take a piece of yarn approximately 6 inches long and position its center into the small slits you cut on the bunny. Make sure the yarn is evenly placed, with about 2.5 inches hanging down on each side. This will help secure the pom-pom in place.
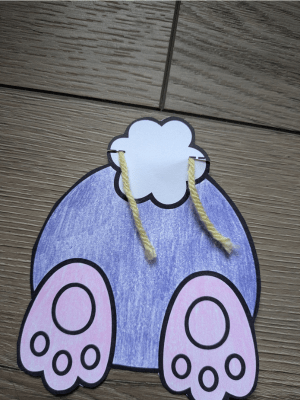
Tie your pom-pom onto the bunny.
Using scissors, snip through all the loops on both sides of the tied yarn to create the pom-pom shape.
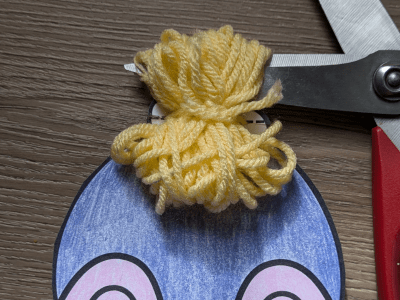
Fluff out the pom-pom by rolling it in your hands, then use scissors to trim any uneven strands until you have a nice, round shape.
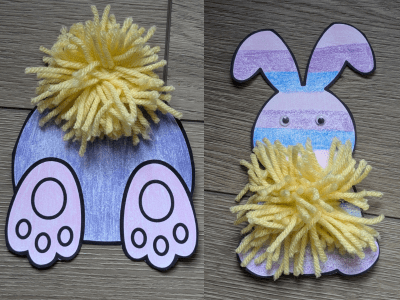
Step 5 – Add the Finishing Touches
Feel free to get creative and add as many finishing touches as you’d like to make your pom-pom bunny unique! Attach googly eyes for a fun, playful look, or use markers, crayons, or stickers to draw a cute bunny face. You can also write “Happy Easter” on its body, ears, or a small sign for a festive touch.
Add a tiny pom-pom or a cotton ball for a fluffy tail, glue on pipe cleaners for whiskers, or even tie a ribbon around its neck for an extra charming detail. Let your imagination run wild and make your bunny one-of-a-kind!
Things You Can Do With Your Completed Pom-Pom Bunny
Once you’ve made your adorable pom-pom bunny, here are some fun and creative ways to use it:
Easter Basket Decoration – Place it in an Easter basket for a cute and festive touch.
DIY Gift Topper – Attach it to a present to make your gift extra special.
Fridge Magnet – Glue a small magnet to the back and stick it on the fridge.
Keychain or Bag Charm – Attach a keyring or loop of string to carry your bunny everywhere.
Room Decor – Display it on a shelf, desk, or nightstand for a sweet decoration.
Puppet or Playtime Buddy – Use it in imaginative play or pair it with other pom-pom animals for a fun set.
Bookmark – Glue it to a popsicle stick for a cute bunny-themed bookmark.
Handmade Card Embellishment – Glue it onto a homemade Easter or birthday card.
These fluffy little bunnies can be used in so many ways—get creative and have fun! 🎨✨
I hope you enjoy making this pom-pom bunny rabbit craft as much as I did!
Creating your own pom-pom Easter bunny is a simple, fun, and rewarding craft that kids and adults alike will enjoy! With just a few supplies, you can make an adorable, fluffy bunny that’s perfect for Easter decorations, gifts, or imaginative play.
Whether you use it to brighten up an Easter basket, as a festive décor piece, or as a fun DIY project with family, this craft is a great way to celebrate the season. So grab your yarn, get creative, and enjoy making these cute little bunnies! Don’t forget to share your creations and spread the Easter cheer. Happy crafting!

Leave A Comment